A.I. Art BlogLook here for announcements and progress I have made on my A.I. Art projects since 2005. Archive 2025 3 2024 11 2020 3 2019 1 2018 13 2017 23 2016 37 2015 15 2014 12 2013 6 2010 2 2009 5 2008 4 2007 1 cloudpainter Pindar Van Arman 10/18/16 cloudpainter Pindar Van Arman 10/18/16 Painting Robot's Ultimate Goal is to Eliminate All Humans Read More Neural Jet, Earlier Robots Pindar Van Arman 8/31/16 Neural Jet, Earlier Robots Pindar Van Arman 8/31/16 Refined Paint Head (Model R) Read More Neural Jet Pindar Van Arman 8/29/16 Neural Jet Pindar Van Arman 8/29/16 Paint Head Prototype Constructed Read More Neural Jet Pindar Van Arman 8/21/16 Neural Jet Pindar Van Arman 8/21/16 Using 3D Printer to Manufacture Parts Read More Neural Jet Pindar Van Arman 8/13/16 Neural Jet Pindar Van Arman 8/13/16 3D PRINTER ARRIVES - OPENING, UNPACKING, AND ASSEMBLING Read More Neural Jet Pindar Van Arman 8/2/16 Neural Jet Pindar Van Arman 8/2/16 Initial 3D Sketches of Paint Head Complete Read More
cloudpainter Pindar Van Arman 10/18/16 cloudpainter Pindar Van Arman 10/18/16 Painting Robot's Ultimate Goal is to Eliminate All Humans Read More
Neural Jet, Earlier Robots Pindar Van Arman 8/31/16 Neural Jet, Earlier Robots Pindar Van Arman 8/31/16 Refined Paint Head (Model R) Read More
Neural Jet Pindar Van Arman 8/29/16 Neural Jet Pindar Van Arman 8/29/16 Paint Head Prototype Constructed Read More
Neural Jet Pindar Van Arman 8/21/16 Neural Jet Pindar Van Arman 8/21/16 Using 3D Printer to Manufacture Parts Read More
Neural Jet Pindar Van Arman 8/13/16 Neural Jet Pindar Van Arman 8/13/16 3D PRINTER ARRIVES - OPENING, UNPACKING, AND ASSEMBLING Read More
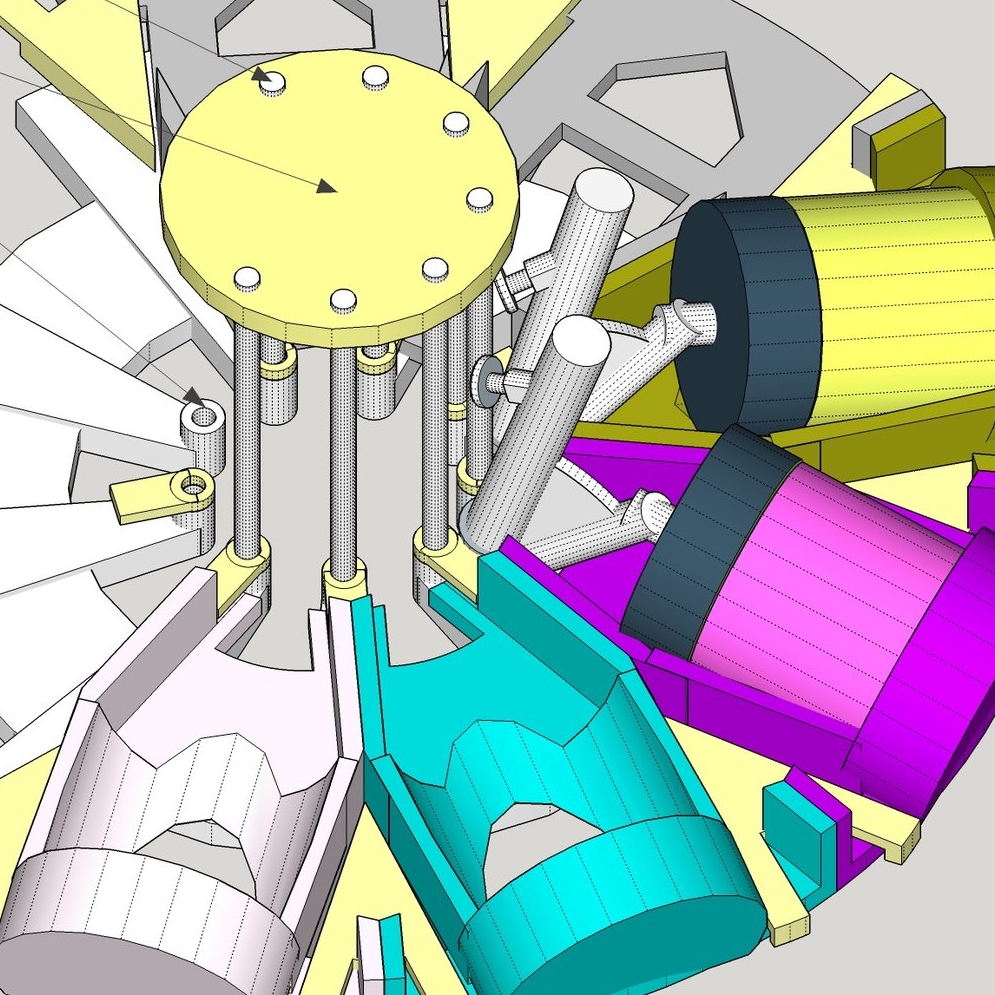
Neural Jet Pindar Van Arman 8/2/16 Neural Jet Pindar Van Arman 8/2/16 Initial 3D Sketches of Paint Head Complete Read More